
Scrappy Backgrounds: a Round Up & Mini Tutorial
I love a good scrappy back - especially on scrap quilts!
I've made many of them & typically employ one of two methods.
First up: extra blocks & yardage.
This method either uses extra blocks (when I've made too many) or fabric from the front to make extra blocks. Add a bit of yardage and voila - a back!
Typically the back of your quilt needs to be 4" larger than your top on all sides so factor that in when you're drawing up your plan.
Scroll down for some visuals & a quick explanation of how each back was made.

This backing is made up of (3) Swoon blocks (pattern by Thimbleblossoms) using left over low volume & purples from the front. The strips between each block are also left over from the front.
I only had 3 yards of the purple print I wanted to use, so I set the Swoon blocks to one side of that fabric and pulled a solid purple from my stash to use on the other side.
I made sure to cut the scrap strips (above & below the swoons) 4" over, and situate the quilt far enough over that I wouldn't end up with just an inch of my purple solid once I trimmed it.

I bought far too much of the yellow I used on the front of this quilt, as well as having two extra triangle blocks left over.
I just arranged them making sure to keep the extra floral fabric centered as much as possible.

A single strawberry block, extra blue yardage from the font, and two cuts of yardage on the top/bottom.

This Sun Star quilt uses the same exact method as the Simply Strawberry above; a single block, coordinating fabric to the sides of it, with yardage above & below.

Yes, this is the back! I improv pieced the whole back using the left overs from the front because I had extra time & I liked the shape of the scraps I had cut off from the front (the teal/white and orange/white rectangles)

While this one may not look like much, the solids on the right are all left over from the front. I had a few fat quarters (the icy florals in between them) that I added for extra length, and paired the whole things with the little bit of yardage I had of my favorite Bonnie & Camille print.

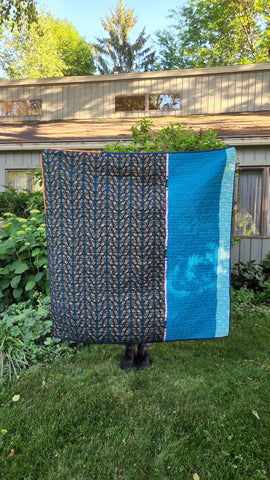
The grey & small rectangles were left over from the front. The bottom fabric (mountains) was left over from a different quilt backing.
I didn't have enough of the prints to form traditional blocks, but I had enough to make some coin stacks.

A very simple backing; I didn't have enough yardage so I used the solids from the front to make a strip to cover the difference.

The front of this is a pixel quilt, so everything was cut into squares. I used the leftovers to form these two long strips, popped the extra yardage next to it & used the small amount of coordinating fabric I found in my stash for the rest of the back.

This backing combines my two methods; extra blocks (log cabin) and assorted scraps (right).
Assorted Scraps:
This uses up large scraps, cut offs from other backings, and sometimes the overage if I ordered too much yardage for the front!
The easiest way for me to put these together is to measure the quilt top, add 4" to each side, and put washi tape on my design wall at those measurements.
Then I fill in the area with various cuttings until it is completely filled.
I make sure to overlap each piece of fabric just a little for the seam allowance, then treat it like a puzzle & sew it together piece by piece.
Sometimes it's as simple as sewing a few long cuts together. Sometimes it is much more intricate.
Scroll down for some visual aids & quick explanations!
This has a small cut of yardage, a solid from my stash, and a long cut off from another quilt back.

This quilt was low volume, blue & orange, so I grabbed yardage (left) fat quarters & cut offs, overlaying them until they filled the space I had & sewed them in three columns.

Solids in rainbow order, three loooong skinny strips & one left over yardage made this backing.

A yard & half of yardage, left over from a previous back, paired with lots of yellow, orange & pink scraps.

These are all small cuts of yardage that were left over - I had ordered 5 yards of something but only used 4 or 4 1/2.

This one is also left over yardage - I had a yard of each of the two on the right; the left side is all left overs from other quilt backs.

This one took a bit of figuring out because every print was directional. But I made it work in the end!

This is (3) fat quarters and two pieces of yardage from the line I used on the front of the quilt.
Hope this inspires you to create you your own Party In the Quilt Back!